Most people who use AI agents still treat them like very smart interns. They write a careful prompt, hit enter, and hope for the best. When the output is wrong, they rewrite the prompt and try again. That works for trivial tasks. It collapses the moment the work is long, messy, or has to be right.
Loop engineering is the upgrade. It treats the agent not as a one-shot answerer but as a system that can act, observe, and improve inside a controlled cycle. Instead of one prompt and one output, you build a loop that runs the agent, checks the work, fixes the issues, and stops only when the result is good enough.
The shift from prompter to loop designer is the most important skill change happening in AI work right now. Prompting is about asking well. Loop engineering is about building well.
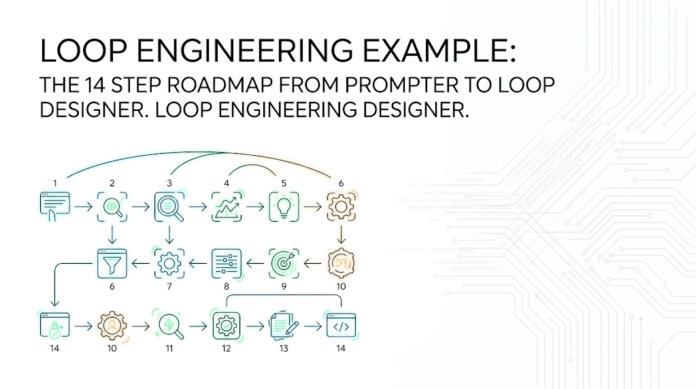
This guide walks through the 14 steps that take you from one to the other.
What Loop Engineering Actually Is
Loop engineering is the practice of designing the execution cycle around an AI agent, not just the prompt that triggers it. A loop has a goal, an action, an observation, a decision, and a stop rule. The agent runs, sees what happened, decides what to do next, and either keeps going or exits.
That sounds abstract, so here is the simplest possible example. You ask an AI to fix a broken Python project. A prompter would write one careful prompt, get one answer, and hope it works. A loop engineer would design a cycle that does this:
The agent is the same in both cases. The difference is the loop around it. The prompter hopes. The loop designer verifies.
Why Loop Engineering Matters Now
Three things have changed in the last two years that make loop engineering essential rather than optional.
Models are good enough to use inside loops. A 2023-era model could not reliably critique its own output. A 2026-era model can. That changes what a loop can do. You can now have a generator and a critic in the same workflow, both powered by the same model or different models.
Agents are running real production work. Customer support, code review, lead enrichment, document processing, data cleaning, research, content moderation. These are not demos anymore. They run in production, and production needs reliability. A single prompt cannot be reliable at scale. A loop can.
Token costs make efficiency important. Running a long agent with no stopping rule burns money. Loop engineering is also cost engineering. The stop condition is what keeps the bill from going off the rails.
In short, the agent era is here, and the people who can build reliable loops around agents are the ones building the most valuable AI products.
From Prompter to Loop Designer: The Mental Shift
The first thing to internalize is that you are not writing a prompt. You are designing a system. The mental model is closer to writing a test plan than writing a query.
A prompter thinks:
- What should I ask?
- How do I phrase it?
- How do I get a better answer next time?
A loop designer thinks:
- What is the goal?
- What does “done” look like?
- How will the system know it is done?
- What happens if it is not done?
- How does it recover?
- When does it stop?
- How do I observe what it did?
- How do I improve it next run?
The shift is from “asking” to “designing.” It is the same shift that happened in software when people moved from writing scripts to designing systems, or from writing functions to designing services. The unit of work is bigger. The leverage is bigger. The skill is harder.
The 14-Step Roadmap
The 14 steps are organized into four phases. Each phase moves you further along the journey from prompter to loop designer.
- Phase 1 (Steps 1 to 4): Set the stage
- Phase 2 (Steps 5 to 7): Generate and validate
- Phase 3 (Steps 8 to 10): Refine and improve
- Phase 4 (Steps 11 to 14): Close the loop
Phase 1: Set the Stage
These four steps are what you do before the agent ever runs. Skipping them is the most common cause of broken loops.
Step 1: Define the goal. Start with a precise outcome, not a vague instruction. “Make this better” is not a goal. “All unit tests pass and the response time is under 200ms” is a goal. The agent can only optimize for what it understands. If the goal is fuzzy, the loop will optimize the wrong thing.
A good goal has three properties: it is specific, it is measurable, and it can be checked by something other than the model. “Code that looks clean” fails. “Tests pass” passes.
Step 2: Load context. Give the agent the files, rules, and history it needs to act well. A loop without context is a loop that hallucinates. Pull in the relevant code, documentation, prior outputs, and any constraints the agent must respect.
For coding agents, this means the file tree, the test harness, the lint config, and the project conventions. For content agents, it means the style guide, the brand voice, and the prior posts. The more relevant context, the better the first output, and the fewer iterations the loop needs.
Step 3: Set constraints. Tell the agent what it cannot do, what matters most, and what success means. Constraints are different from goals. Goals define what to achieve. Constraints define what to avoid.
Common constraints in real loops: do not modify test files, do not call paid APIs, do not exceed 5,000 tokens of output, do not write to production databases, do not produce content that violates the brand policy. Constraints turn a hopeful loop into a controlled one.
Step 4: Break the work into small tasks. Large tasks are easier to manage when divided into chunks. A loop that tries to do everything in one step is a loop that fails opaquely. A loop that breaks the work into 10 small steps, each verified, is a loop that fails visibly and recovers.
In practice, this means designing a planning step that produces a task list, then iterating over that list one task at a time. Each task gets its own context, its own action, and its own check.
Phase 2: Generate and Validate
The agent runs for the first time. Your job is to make sure its first output is real, not hallucinated.
Step 5: Generate the first draft. Let the agent create an initial version quickly. Do not aim for perfection. The first draft is a starting point for the loop to improve on. Asking for the perfect first output is asking for the slowest loop.
A useful mental model: the first draft is the hypothesis. The next steps are the experiments. A loop that demands a perfect first draft will stall. A loop that accepts a good-enough first draft and improves from there will run.
Step 6: Run validation. Check the output with tests, linting, rules, or a verifier. Validation is the heart of the loop. Without it, the agent is just producing text. With it, the agent is producing verifiable work.
For code, validation means running tests, linters, and type checkers. For content, validation means checking facts, length, tone, and structure. For data, validation means checking schemas, ranges, and referential integrity. The validator is what makes the loop real.
Step 7: Detect errors. Inspect failures instead of assuming the output is correct. Many “successful” loops produce outputs that look fine but contain subtle errors. Detecting errors is not the same as running validation. Validation checks whether the work is done. Error detection checks whether the work is right.
In a coding loop, this means reading the diff and looking for bugs the tests did not catch. In a content loop, it means reading for factual claims and tone violations. In a research loop, it means checking that every citation actually supports the claim it is attached to.
Phase 3: Refine and Improve
The first output failed. The loop now has a job: fix it.
Step 8: Fix the issues. Feed the errors back into the loop and revise the work. This is the step most prompters never reach. They stop at “the model gave me a bad answer” and rewrite the prompt. A loop designer feeds the failure back and asks the agent to revise.
The fix step works best when the errors are specific. “Tests failed” is a bad input. “Tests failed on lines 42 to 56 with AssertionError: expected 200, got 500” is a good input. The more specific the failure, the better the fix.
Step 9: Re-test. Validate the corrected version again. This is not the same as Step 6. Step 6 validated the first draft. Step 9 validates the fix. The difference matters because fixes often introduce new errors, especially in code. Always re-test.
A common mistake is to assume the fix worked because the agent said it did. Agents are confidently wrong. The re-test step is what catches that.
Step 10: Compare against the target. Measure the result against the original goal. This is the check that connects the loop back to Step 1. Did we hit the goal? Partially? Not at all? The answer determines whether the loop continues, iterates, or exits.
A useful habit is to score the output on a small rubric, not just a binary pass-fail. “Is the test suite green” is binary. “How much of the original goal is met” is a more useful signal for the loop to act on.
Phase 4: Close the Loop
The agent has done its work. The loop now has to finish cleanly.
Step 11: Record state. Save progress so the loop can continue without losing context. State management is the unglamorous part of loop engineering, and the part that separates a working loop from a brittle one. If the loop runs across multiple turns or multiple invocations, the state has to survive.
In a coding agent, this means saving the diff, the test results, the plan, and the next step. In a long-running research agent, it means saving the partial findings, the source list, and the open questions. Without state, the loop restarts from zero every iteration.
Step 12: Use a checker. Add a second pass, reviewer, or sub-agent for quality control. The maker-checker pattern is one of the most reliable ideas in loop engineering. One agent generates. A different agent (or the same agent with a different prompt) reviews. The two perspectives catch different errors.
This is especially useful in production. The generator optimizes for completion. The checker optimizes for correctness. A loop that has only a generator will eventually ship confidently wrong outputs. A loop that has both will catch most of them.
Step 13: Stop on success. Make the loop exit only when the conditions are met. A loop that does not know how to stop is a loop that burns tokens forever. Define the exit conditions explicitly. “All tests pass” is a good stop. “Three retries have happened” is a good fallback stop. “We are within budget” is a good safety stop.
The stop condition is the difference between an agent that ships and an agent that spins. Most poorly designed loops fail here. The agent never quite gets there, never quite fails, and runs until the user manually kills it.
Step 14: Save the final output. Keep the result, logs, and lessons for the next run. The last step of a loop is what makes the next loop better. Save the output, save the prompt, save the validator results, save the failure modes. Over time, this becomes the institutional memory of the agent.
In production, this means structured logging, trace IDs, and a way to replay a loop run. In personal projects, it means a simple folder per run with the inputs, the outputs, and a short note on what worked. The habit of saving the run is the habit of getting better.
A Concrete Example: Fixing a Broken Python Project
The fastest way to see loop engineering in action is to walk through a real example. Imagine you inherit a Python project with 14 failing tests. Your job is to make them pass.
A prompter would write one careful prompt and hope. A loop designer would build a cycle.
pythonCopy
# Pseudocode for a coding loop
goal = "All 14 failing tests pass with no new test failures"
state = load_repo_and_tests()
max_retries = 5
retry_count = 0

while retry_count < max_retries:
    # 1. Run the validator
    test_output = run_tests()

    # 2. Stop on success
    if all_tests_passing(test_output):
        save_state(success=True)
        break

    # 3. Detect specific errors
    errors = parse_failures(test_output)

    # 4. Generate a fix
    fix_prompt = build_fix_prompt(
        repo=state.repo,
        errors=errors,
        previous_attempts=state.previous_attempts,
    )
    patch = agent.generate(fix_prompt)

    # 5. Apply the fix
    apply_patch(patch)

    # 6. Re-test
    new_test_output = run_tests()

    # 7. Check for regressions
    if new_test_output.regressions > test_output.regressions:
        revert_patch()
        retry_count += 1
        continue

    retry_count += 1
    state.previous_attempts.append(patch)

if retry_count >= max_retries:
    escalate_to_human(state)
This is loop engineering. The agent does the creative work (generating the fix). The loop does the verification work (running tests, checking regressions, deciding whether to keep the patch). The human is the escape hatch, not the babysitter.
Another Example: Content Quality Loop
The same pattern works outside of code. Imagine you run a content team and want every published article to hit a quality bar.
The goal: “Article is on-brand, factually accurate, and within the target word count.”
The loop:
A weak version of this loop checks only the word count. A strong version checks the actual quality. The difference is the depth of the validators, not the structure of the loop.
What Makes a Loop Good
A strong loop has five properties. Use this as a checklist when you design one.
1. A clear goal. If you cannot write the goal in one sentence, the loop is not ready.
2. A reliable validator. If the validator is wrong, the loop is wrong. Garbage validators produce confidently wrong outputs.
3. State that survives between turns. The loop should not lose context between iterations. If it does, every retry starts from zero.
4. Stop rules that prevent endless guessing. The loop should exit on success, on hard failure, or on budget. Never on “the agent feels done.”
5. A maker and a checker. One part creates. Another part reviews. The two perspectives catch different errors.
Loops that miss any of these five properties will work in demos and fail in production. The fix is almost always to add the missing property, not to rewrite the loop.
Common Loop Patterns
A few loop patterns show up over and over. Recognizing them saves design time.
Retry loop. The simplest pattern. Run, fail, retry. Useful for transient failures like API timeouts or rate limits.
Plan-execute-verify loop. The agent plans the work, executes the plan, and verifies the result. Then it either ends or revises the plan. This is the workhorse pattern for non-trivial tasks.
Research loop. The agent gathers information, evaluates sources, identifies gaps, gathers more information, and continues until it has enough evidence. Used for research, summarization, and competitive analysis.
Debugging loop. The agent writes or modifies code, runs tests, reads errors, and patches until tests pass. The Python example above is a debugging loop.
Human-in-the-loop. The agent works until it hits a decision it cannot make, then pauses for human input. Useful for high-stakes actions (deploys, payments, customer-facing comms) where the cost of a wrong autonomous decision is high.
Maker-checker loop. One agent generates. Another agent reviews. The loop continues until the checker approves. Useful for content, code review, and any task where quality matters more than speed.
The right pattern depends on the task. Most production loops combine two or three of these.
Loop Engineering Tools and Frameworks
You do not need to build a loop from scratch. The ecosystem has matured fast.
- LangGraph. A framework for building stateful, multi-actor agent loops. Strong for production coding agents and research workflows.
- CrewAI. A framework for orchestrating multiple agents in a loop, with explicit roles and task assignments.
- AutoGen. Microsoft’s framework for multi-agent conversations and loops.
- Inngest, Temporal, Trigger.dev. Durable execution frameworks that handle state, retries, and stop conditions for long-running agent loops.
- Custom Python with a state store. For simple loops, a Python script with a SQLite or Postgres state store is often enough. Do not over-engineer.
For most builders in 2026, the right starting point is LangGraph for production loops and a custom Python script for personal projects. Reach for the bigger frameworks only when the loop has real production traffic.
Common Mistakes Loop Designers Make
A few mistakes show up in almost every new loop.
- Vague goals. “Make this better” is not a goal. A vague goal produces a vague loop.
- No validator. A loop without a validator is a loop that ships hallucinations.
- No stop condition. A loop without a stop condition is a money furnace.
- Re-running from scratch every iteration. A loop that loses state every turn is not really a loop. It is a series of one-shots.
- Trusting the agent’s self-assessment. Agents are confidently wrong. Always verify with an external check.
- Single-agent everything. Some loops need a maker and a checker. A single agent trying to do both often optimizes for completion over correctness.
- No logs. A loop you cannot debug is a loop you cannot improve. Save the inputs, the outputs, the validator results, and the failure modes.
The fix for each of these is structural, not prompt-level. If the loop is broken, do not rewrite the prompt. Rewrite the loop.
How to Practice Loop Engineering
Loop engineering is a learnable skill. The fastest way to learn it is to build small loops and break them.
A simple practice path:
Each iteration teaches a different lesson. By the third or fourth loop, the patterns start to feel obvious. By the tenth, you are designing them without thinking.
From Prompter to Loop Designer: The Full Arc
The journey from prompter to loop designer is a journey in three shifts.
The first shift is from asking to designing. You stop thinking “what should I ask” and start thinking “what system should I build.” That shift usually takes a week or two of building.
The second shift is from output to outcome. You stop judging the loop by the quality of any single output and start judging it by whether the goal is met, on average, across many runs. That shift usually takes a month of running loops in anger.
The third shift is from manual to observable. You stop hand-running the loop and start instrumenting it, so you can see where it fails, where it is slow, and where it is wasting tokens. That shift usually takes a quarter of running loops in production.
The 14 steps in this guide are the map. The actual learning happens in the building.
Conclusion
Loop engineering is the most important skill change in AI work right now. The shift from prompting to loop design is the difference between treating the model as a very smart intern and treating it as a reliable system. The prompter asks. The loop designer builds.
The 14 steps are a roadmap, not a religion. Use them as a checklist for the first loop you build, then internalize them and forget the list. The goal is not to follow the steps. The goal is to build loops that work.
The agents of the next few years will not be defined by which model they use. They will be defined by which loops they run. Learn loop engineering now, and you will be ready for what comes next.
Frequently Asked Questions
What is loop engineering in AI? Loop engineering is the practice of designing the execution cycle around an AI agent, not just the prompt that triggers it. A loop has a goal, an action, an observation, a decision, and a stop rule. The agent runs, sees what happened, decides what to do next, and either keeps going or exits. Loop engineering is the upgrade from one-shot prompting to reliable agent systems.
What is the difference between prompting and loop engineering? Prompting is writing a single instruction and getting one response. Loop engineering is building a system that runs the agent, checks the work, fixes the issues, and stops only when the result is good enough. Prompting is about asking. Loop engineering is about designing.
What are the 14 steps of loop engineering? The 14 steps fall into four phases: set the stage (define goal, load context, set constraints, break into tasks), generate and validate (first draft, run validation, detect errors), refine and improve (fix issues, re-test, compare against target), and close the loop (record state, use a checker, stop on success, save the final output). Each step is a checkpoint in the loop design process.
What is the maker-checker pattern in loop engineering? The maker-checker pattern is a loop design where one agent generates the work and a second agent reviews it. The two agents catch different errors. The maker optimizes for completion. The checker optimizes for correctness. Used together, they produce more reliable outputs than a single agent working alone.
What tools are used for loop engineering? Common loop engineering tools include LangGraph for stateful agent loops, CrewAI for multi-agent orchestration, AutoGen for multi-agent conversations, and durable execution frameworks like Inngest, Temporal, and Trigger.dev for production loops. For simpler projects, a custom Python script with a state store is often enough.
What is the biggest mistake in loop engineering? The biggest mistake is designing a loop without a stop condition or a reliable validator. A loop without a stop condition burns tokens forever. A loop without a reliable validator produces confidently wrong outputs. Both are easy to fix in the design phase and very hard to fix in production.
How do you debug a loop that is not working? Save every run. Log the inputs, the outputs, the validator results, and the failure modes. Then look at the runs that failed. Most loop failures are caused by three things: a vague goal, a weak validator, or state that is not surviving between turns. Fixing one of those usually fixes the loop.
Is loop engineering the same as building AI agents? Building an agent is one piece of loop engineering. The other pieces are the validators, the stop conditions, the state management, the maker-checker pattern, and the logs. The agent is the worker. The loop is the system that keeps the worker honest.
How long does it take to learn loop engineering? A motivated builder can learn the basics in a weekend. The intermediate skills (state management, durable execution, multi-agent loops) take a few weeks. The advanced skills (production reliability, observability, cost optimization) take a few months of real runs. The skill compounds. Every loop you build teaches you something the previous one did not.
Where should I start with loop engineering? Start with a one-step retry loop on a task you already understand. Add a validator. Add a stop condition. Run it 10 times. Look at the runs that failed. Then add a planning step. Then add a checker. Within a month of small loops, you will be ready to design a production-grade agent workflow.

